My Ploopy Adept Customizations: Ergonomics and How to Solve Drag Scroll Issues with Custom Firmware and Vial
I've been struggling with the ergonmics of my keyboard and mouse lately. I recently bought a Ploopy Adept to see if it helped with my ergonomic issues and because it's highly customizeable. I've made a few customizations I'm super happy with, and I want to share them in case it can help others get the most out of their QMK devices.
Table of Contents
- A note about customizing the firmware
- Resources I used to figure this out
- Rotate the Adept 180 degrees for negative tilt and easy access to more buttons
- Have access to both momentary and toggled drag scroll
- Make dragscroll work reliably on MacOS
- Conclusions
Customizing your firmware
For all of these customizations I used Vial and Vial-compatible firmware. The Ploopy Adept does not ship with Vial-compatible firmware. You will have to compile and flash the firmware onto your device on your own.
- Warning: You do this at your own risk. I'm not responsible if you brick your trackball (but Ploopy can has a way to flash new firmware if you do brick it)
- I cannot help you do anything I've done. I'll give as much info as I can in this post, but it's up to you to figure it out.
- You don't need Vial to do any of the things I've done, but you do need it for some specific enhancements.
What are VIA and Vial?
VIA is an application for configuring the layout of keyboards. It works with keyboards that use a popular open-source firmware called QMK (Quantum, Mechanical Keyboard). All Ploopy devices ship with QMK, so you can use VIA to configure the layout of any Ploopy device out of the box.
Similarly, Vial is open-source software for configuring your keyboard that uses a fork of QMK. It has all the features VIA offers plus a few more. One of the features Vial has that VIA doesn't is called "tap dance". It lets you configure a key to do one thing when tapped, another when held, etc.
You don't need Vial to do any of the things I've done with my adept - you can edit the code, compile it, and flash it using QMK alone, and then configure macros and layers with VIA. I used Vial because I thought I needed tap dance. It turned out not to be useful for me with the Adept, but I kept Vial anyway in case I need its features in the future.
Resources
Ploopy offers some good advice on compiling and flashing QMK firmware to your device. Start there, but be aware that their instructions are not specific to Vial. You will need their instructions to know how to put the device into bootloader mode so you can flash new firmware onto it.
I used Vial's instructions to set up my development environment (as of this writing, steps 1-4 at the bottom of this page). That includes installing QMK, cloning Vial's fork of QMK, and compiling and flashing their firmware onto your device.
I'll list the file path for every file I changed. All file paths are in the directory of the Vial fork of QMK that you'll clone if you want to follow along.
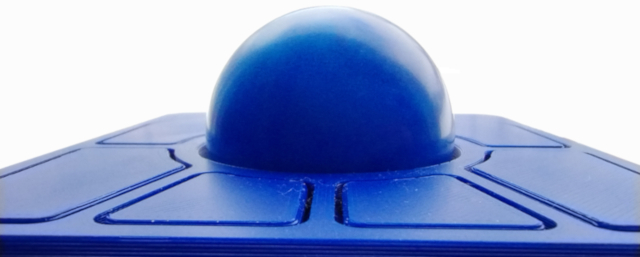
Rotated Adept
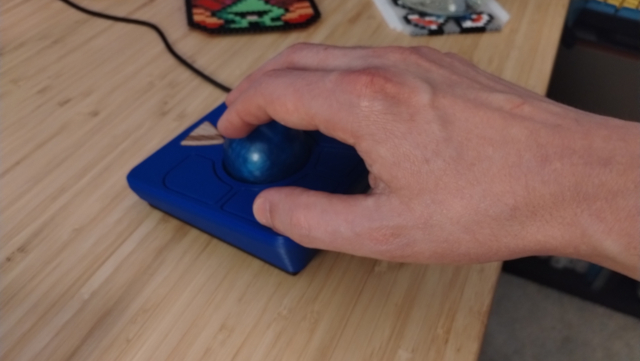
I work at a computer 40+ hours a week, and I've been feeling some pain in my arms recently. I surmised this was caused by repetitive stress and resting my arms and wrists on my desk and chair. Your mileage will vary, but negative keyboard tilt has helped me - tilting the spacebar end of the keyboard up so my wrists tilt down while I'm typing. I figured why not try the same with the Adept. The Adept has a positive tilt, so all I needed to do was rotate it 180 degrees.
An added benefit of doing this is that I have easy access to 4 of the Adept's 6 buttons with my thumb and pinky. I've found I like to move the ball with my fingertips, so it's nice to only have to reach over it for two of the buttons.
Invert the Trackball
In order to use the adept like this, we need to invert the trackball's X and optionally Y dimensions. By default, the trackball is inverted in the Y direction but not the X direction. This makes the cursor go up when you rotate the ball away from yourself, and to the right when you rotate it right.
I like this configuration, so I have to invert both the X and Y axes from the setting the Adept ships with.
In keyboards/ploopyco/madromys/config.h I commented out the Y invert, but uncommented the X invert and the Dragscroll invert. This makes the ball behave as expected when the device is rotated 180 degrees. Click here to see that file in context with this change.
the following is a C code sample taken from keyboards/ploopyco/madromys/config.h
//#define POINTING_DEVICE_INVERT_Y // Don't invert Y so I can use Adept upside down
#define POINTING_DEVICE_INVERT_X // Invert X so I can use Adept upside down
#define PLOOPY_DRAGSCROLL_INVERT // Invert drag scroll direction so I can use Adept upside down
Compiling the firmware with these changes in keyboards/ploopyco/madromys/config.h file makes the trackball behave as expected when the device is rotated 180 degrees.
Vial Keymap Layout
Now we need to adjust the keymap in Vial to make sure the keys are laid out how we want. The keymap in vial shows the keys laid out as they are with the device facing the intended direction, and I thought I would make mistakes trying to remap the keys that way. Instead, I wanted to rotate the keys in the keymap that appears in Vial.
I did this by editing the layout in keyboards/ploopyco/madromys/keymaps/vial/vial.json. It took a while to figure out how to do this, because the layout system it uses is not documented anywhere that I could find, and it's unlike any other layout system I've ever used. Once I understood it, I realized this system makes it easy to lay out many keys on a row-based keyboard. I've documented what I learned about it below.
Click here to see the 180-degree-rotated layout in Github. You may have to scroll down to the vial.json file.
Compiling the firmware with this file makes the adept's buttons appear in the 180-degree-rotated orientation in Vial.

How does the layout system work?
In keyboards/ploopyco/madromys/keymaps/vial/vial.json layouts.keymap is an array of object/string pairs. First comes an object representing coordinates and size of a button, then a string representing which button this object refers to. The string is formatted as ","column", and I believe this must correspond to the row and column keyboards/ploopyco/madromys/info.json, although I haven't seen how that file affects Vial.
As far as I can tell, each keymap object can contain 4 fields, and all of them are optional.
- a horizontal coordinate, "x"
- a vertical coordinate, "y"
- a height value, "h"
- a width value, "w"
Height and Width
Each key has a height and width of 1 arbitrary unit, so they appear as squares in Vial by default.
I let the smaller buttons on the adept be height 1, and I gave the larger buttons a height of 1.5. That way they appear to be about the right size compared to the small buttons.
X and Y
x's and y's default values are relative to the location of the previous button in the array. x's is also relative to the previous button's width.
A button's x coordinate is where the left edge will be, and its y coordinate is where the top edge of the button will be. A larger x value is farther to the right than a smaller one, and a larger y value is farther down than a smaller one.
The first button in my array is the bottom-left button if you're looking at the Adept as it was intended to be used, but for me is the top-right. I'll draw the buttons moving clockwise from that button. It has (x,y) coordinates of (0,0), which is the default for the first button, but I've set it explicitly.
I want the second button to appear below the first and aligned with it horizontally. Here's where it gets tricky.
The default x coordinate for the next button in the array is at the right edge of the previous button by default. That makes sense if you're usually laying out rows of many keys that all touch each other as on a standard keyboard.
You can derive the next button's default x coordinate by adding the previous button's width to its x. For the second button in my array, the default x is 0 (previous x) + 1 (height) = 1. However, I want my second button's left edge to align with the first button's left edge, so I have to subtract the first button's width from its x. 0 (previous button's x) - 1 (previous button's width) gives us an x of -1. Remember, this is relative to the default for this button, not absolute, so it will align the second button horizontally with the first.
The default y coordinate for the next button is the same as the y coordinate for the previous button. That's because keyboards are typically laid out in rows. I want my second button to be below the previous button, with a little space in between. To make that happen I have to add the height and y coordinate of the previous button and then add an offset. 0 (previous y) + 1.5 (height) + 0.1 (offset) gives the second button a y coordinate of 1.6.
Continuing from there, the next button, one of the small ones, has an x of -2.1 so it is a full key plus an offset to the left of the previous button. It has a y of 0.52 so its bottom edge aligns with the previous button. We continue in this way until all the buttons are laid out.
Separate Momentary and Toggle Drag Scroll
The firmware Ploopy provides for the Adept includes a special key definition and custom C code for drag scroll. Activating drag scroll makes the trackball scroll instead of moving the mouse cursor.
In keyboards/ploopyco/madromys/config.h, you can define PLOOPY_DRAGSCROLL_MOMENTARY
to activate drag scroll only while the key is held down, called "momentary" drag scroll. Or you can comment
that line out to make the drag scroll button toggle the feature on and off.
I wanted both. I usually prefer to use momentary drag scroll because it gives me the flexibility to quickly scroll a little bit while also clicking on things. If I'm scrolling a very long document and not using the mouse otherwise, I may want to toggle it on to give my hand a break from holding the button.
We need changes to a few files to do this. All of the changes required can be found in this commit on Github.
First, we need a new keycode to represent momentary drag scroll. We'll treat the existing keycode as the
toggle drag scroll. Custom keycodes are enumerated in keyboards/ploopyco/ploopyco.h in an enum called ploopy
keycodes. We'll add DRAG_SCROLL_MOMENTARY at the end as in
the code snippet below.
the following is a C code sample taken from keyboards/ploopyco/ploopyco.h
enum ploopy_keycodes {
    DPI_CONFIG = QK_KB_0,
    DRAG_SCROLL,
    DRAG_SCROLL_MOMENTARY,
};
Now we can use our new keycode in the code that toggles drag scroll in keyboards/ploopyco/ploopyco.c.
Before we change anything, observe in the code snippet below that the process_record_kb function checks
whether PLOOPY_DRAGSCROLL_MOMENTARY is defined in
keyboards/ploopyco/madromys/config.h. If it is, it sets a variable called is_drag_scroll to activate
dragscroll if the key is currently held down. If not, it toggles that variable.
the following is a C code sample taken from keyboards/ploopyco/ploopyco.c.
bool process_record_kb(uint16_t keycode, keyrecord_t* record) {
  // ...other code here
  if (keycode == DRAG_SCROLL) {
  #ifdef PLOOPY_DRAGSCROLL_MOMENTARY
    is_drag_scroll = record->event.pressed;
  #else
    if (record->event.pressed) {
      toggle_drag_scroll();
    }
  #endif
  }
  // ...other code here
}
We can change this section of the function to look for our new keycode instead of looking for PLOOPY_DRAGSCROLL_MOMENTARY, as in the code snippet below
the following is a C code sample taken from keyboards/ploopyco/ploopyco.c.
if (keycode == DRAG_SCROLL) {
  if (record->event.pressed) {
    toggle_drag_scroll();
  }
}

if (keycode == DRAG_SCROLL_MOMENTARY) {
  is_drag_scroll = record->event.pressed;
}
Finally, we need to tell Vial about our new keycode so it will be available to assign to a button when we're editing the keymap. We add it to the "customKeycodes" array in keyboards/ploopyco/madromys/keymaps/vial/vial.json, and give it a name, title, and short name as in the following code snippet.
the following is a JSON code sample taken from keyboards/ploopyco/madromys/keymaps/vial/vial.json
 "customKeycodes": [
  {
    "name": "DPI Config",
    "title": "DPI Config",
    "shortName": "DPI"
  },
  {
    "name": "Toggle Drag Scroll",
    "title": "Toggle Drag Scroll",
    "shortName": "Drag\nScrl"
  },
  {
    "name": "Momentary Drag Scroll",
    "title": "Momentary Drag Scroll",
    "shortName": "MDrag\nScrl"
  },
],
Making drag scroll work consistently on MacOS
I use MacOS for work. You can send your condolences to info@ryanheisler.com. When I switched to using the Adept on Mac I noticed that drag scroll would work sometimes and not others. I would have to press and hold momentary drag scroll two to five times before it would scroll.
Investigation
When it didn't work, the mouse cursor would not move. The drag scroll code prevents the cursor from moving, so I took this as evidence that the Adept knew I was trying to scroll but the operating system wasn't recognizing the scroll events coming from the Adept.
Searching the web, I found someone complaining of a similar issue in the Ploopy subreddit two years ago. Despite posting there and in the QMK subreddit, they never got a resolution.
Failed Attempt to Use Mouse Wheel Events
keyboards/ploopyco/ploopyco.c has a function called "pointing_device_task_kb", which processes mouse updates, and it's where the drag scroll functionality is actually implemented. It makes drag scroll work by following the steps below. You can see the implementation of drag scroll here on Github.
- Get x and y from the current mouse report. These represent vertical and horizontal changes in the mouse cursor's position since the last time the position was updated.
- Divide these values by a configured divisor (to allow the user to control how fast or slow the drag scroll goes)
- Assign these values to the mouse report's v (vertical) and h (horizontal) fields, which the operating system will interpret as a scroll event.
- Set the mouse report's x and y to 0 to prevent the mouse cursor from moving.
I have a third-party mouse with a scroll wheel and it works just fine on a Mac. I figured this method of scrolling using the mouse report's v and h might be poorly supported on MacOS, and that leads to it working intermittently. Looking at the standard keycodes available in Vial, I noticed that there are some representing the mouse wheel going up, down, right, or left. These are no doubt included so you can make a key on your keyboard scroll when pressed. I thought they might help me scroll in a different way that's better supported by MacOS.
To make this happen, I implemented two new custom keycodes - DRAG_SCROLL_MACOS and DRAG_SCROLL_MOMENTARY_MACOS. Instead of setting the v and h on the mouse report, they called a function to tap the correct mouse wheel event keycode based on how the trackball moved. You can see how I implemented drag scroll with mouse wheel events here, in keyboards/ploopyco/ploopyco.c starting on line 172.
This didn't work. It had the same problem where scrolling would only work some of the time on MacOS, but it was worse than before because when scrolling did work it was choppier and harder to control.
Scrolling in Multiple Directions
When I tried using my new scrolling behavior on a Mac, I noticed something new. When I was scrolling vertically it would not scroll horizontally no matter how much I rotated the trackball sideways. Similarly, if I was scrolling horizontally it wouldn't scroll vertically. The reddit post I linked above mentioned that scrolling would work again if they waited a few seconds with the button held down, so I tried this. Lo and behold I could scroll in my desired direction again if I waited a few seconds, even if I was switching from horizontal to vertical.
I investigated further - could I scroll in multiple dimensions at once using the trackpad built into the Macbook? No! And that was true across apps. Apparently, MacOS prevents you from scrolling vertically and horizontally at the same time.
Only Scrolling in One Direction
The only feasible solution I could think of was to limit scrolling to the vertical dimension when using drag scroll on MacOS. It would be a little annoying that I could only scroll vertically, but much less annoying than having to click and hold
Conveniently, QMK offers an option to detect the current operating system the device is connected to. It will tell your code whether the device is using MacOS, iOS, Linux, or Windows, and it will give a value called "unsure" if it can't tell. I tried to use this feature to change the behavior of the drag scroll functionality, but unfortunately it didn't work for me. Maybe I implemented it wrong, but I didn't want to waste a lot of time debugging because QMK's documentation says it might not always work correctly.
Instead, I implemented two new keycodes, one for drag scroll and one for momentary drag scroll specifically on MacOS. When those keys are used, the drag scroll functionality works as expected, except that it ignores all horizontal movement. That way, the mouse report's h value is always 0, so the operating system can't misinterpret a vertical scroll with a little horizontal movement as a horizontal scroll. ,You can see the implementation of vertical-only MacOS drag scroll in this commit on Github.
To be able to use these new keys with relative ease, I created a second base layer in my Adept button layout. Layer 0, the default layer, still has the normal drag scroll button. Layer 1 is a copy of layer 0 but with the MacOS drag scroll functionality instead. To toggle between the two, I set up a "combo" - when I tap two specific buttons at the same time, the Adept switches to using the other layer.
Conclusions
First, QMK is awesome. All of the customizations I've made to my Adept were possible and even relatively easy thanks to the work of the QMK and Vial communities. Not only that, the customizations are stored on the Adept itself, meaning I don't need to use any special configuration software on each of my operating systems to make the device function as expected.
That's a huge improvement over a device like my Logitech M500 mouse. Just to make the back and forward buttons on that mouse work as expected, you have to install a special Logitech app to assign that behavior to each button. If Logitech decided to stop supporting that app or my mouse, those buttons just wouldn't work on Linux or MacOS. If something like that happens with the Adept, QMK, Vial, or the operating systems I use, I can still write my own firmware for the Adept to keep it working long into the future.
Second, Ploopy and the Adept have impressed me with their open-source model and the quality of the device they sent me. I've never been a fan of 3D printing because it creates a lot of plastic waste from test prints and mistakes. Of course, all plastic devices lead to plastic waste, that was an excuse not to engage with 3D printing. Using the Adept, I've come to realize that a 3D printed device like the Adept will last longer and create less waste overall because it's customizable enough to survive the events that will make my other devices obsolete in the next couple decades.
I also figured 3D-printed plastics couldn't possibly be durable. So far, the Adept seems just as durable as the mouse it replaced. The buttons seem like the most likely part to wear out over time, but even if they do, I can replace only the top part of the case and reuse the bottom and the circuit board, leading to less waste overall. If any of the electronic components fail, I can just replace them with another off the shelf rather than buying a whole new device. That's also true of many closed-source devices, but it's much harder to figure out what part you need, source it, and replace it.
Finally, the flexibility of a QMK device makes it much easier to adjust it for ergonomics. The fact that I can remap the buttons and redraw the button layout means I can orient it however I want. I ended up moving away from negative tilt on the Adept, but I still wanted to keep it rotated by 180 degrees. I gave it a slight positive tile and tented it to the right using a couple of rubber wedges, and now I'm very comfortable using it for hours at a time. I could create a layer to flip the buttons to use it with my left hand when I want to switch, or I could print a whole new case that fits the whole thing into a glove. Anything is possible with the same device because it's so flexible and open.